The Surface
First, some housekeeping: State
We created state in the last tutorial, now let's put stuff in it.
// lib.rs

pub struct State {
    surface: wgpu::Surface<'static>,
    device: wgpu::Device,
    queue: wgpu::Queue,
    config: wgpu::SurfaceConfiguration,
    is_surface_configured: bool,
    window: Arc<Window>,
}
I'm glossing over States fields, but they'll make more sense as I explain the code behind these methods.
State::new()
The code for this is pretty straightforward, but let's break it down a bit.
impl State {
    // ...
    async fn new(window: Arc<Window>) -> anyhow::Result<State> {
        let size = window.inner_size();

        // The instance is a handle to our GPU
        // BackendBit::PRIMARY => Vulkan + Metal + DX12 + Browser WebGPU
        let instance = wgpu::Instance::new(wgpu::InstanceDescriptor {
            #[cfg(not(target_arch = "wasm32"))]
            backends: wgpu::Backends::PRIMARY,
            #[cfg(target_arch = "wasm32")]
            backends: wgpu::Backends::GL,
            flags: Default::default(),
            memory_budget_thresholds: Default::default(),
            backend_options: Default::default(),
            display: None,
        });

        let surface = instance.create_surface(window.clone()).unwrap();

        let adapter = instance
            .request_adapter(&wgpu::RequestAdapterOptions {
                power_preference: wgpu::PowerPreference::default(),
                compatible_surface: Some(&surface),
                force_fallback_adapter: false,
                apply_limit_buckets: true,
            })
            .await?;

        // ...
    }

    // ...
}
Note: if you specify a display handle via the display field on InstanceDescriptor the display you pass into create_surface() must match up with it. You can define the display on the InstanceDescriptor struct directly or with a convenience method:
let instance = Instance::new(InstanceDescriptor::new_with_display_handle(Box::new(event_loop.owned_display_handle())));
Instance and Adapter
The instance is the first thing you create when using wgpu. Its main purpose is to create Adapters and Surfaces.
The adapter is a handle for our actual graphics card. You can use this to get information about the graphics card, such as its name and what backend the adapter uses. We use this to create our Device and Queue later. Let's discuss the fields of RequestAdapterOptions.
power_preferencehas three variants:None,LowPowerandHighPerformance.LowPowerwill pick an adapter that favors battery life, such as an integrated GPU.HighPerformancewill pick an adapter for more power-hungry yet more performant GPU's, such as a dedicated graphics card. WGPU will favorLowPowerif there is no adapter for theHighPerformanceoption. The default isNone, where the power usage is not considered when choosing an adapter.- The
compatible_surfacefield tells wgpu to find an adapter that can present to the supplied surface. - The
force_fallback_adapterforces wgpu to pick an adapter that will work on all hardware. This usually means that the rendering backend will use a "software" system instead of hardware such as a GPU.
What is the Surface?
The surface is the part of the window that we draw to. We need it to draw directly to the screen. Our window needs to implement raw-window-handle's HasRawWindowHandle trait to create a surface. Fortunately, winit's Window fits the bill. We also need it to request our adapter.
Device and Queue
Let's use the adapter to create the device and queue.
        let (device, queue) = adapter
            .request_device(&wgpu::DeviceDescriptor {
                label: None,
                required_features: wgpu::Features::empty(),
                experimental_features: wgpu::ExperimentalFeatures::disabled(),
                // WebGL doesn't support all of wgpu's features, so if
                // we're building for the web we'll have to disable some.
                required_limits: if cfg!(target_arch = "wasm32") {
                    wgpu::Limits::downlevel_webgl2_defaults()
                } else {
                    wgpu::Limits::default()
                },
                memory_hints: Default::default(),
                trace: wgpu::Trace::Off,
            })
            .await?;
The required_features field on DeviceDescriptor allows us to specify what extra features we want. For this simple example, I've decided not to use any extra features.
The experimental_features field specifies whether we intend to use features that are not stable yet. We'll leave this as disabled for now.
The required_limits field describes the limit of certain types of resources that we can create. We'll use the defaults for this tutorial so we can support most devices. You can view a list of limits here.
The memory_hints field provides the adapter with a preferred memory allocation strategy, if supported. You can view the available options here.
        let surface_caps = surface.get_capabilities(&adapter);
        // Shader code in this tutorial assumes an sRGB surface texture. Using a different
        // one will result in all the colors coming out darker. If you want to support non
        // sRGB surfaces, you'll need to account for that when drawing to the frame.
        let surface_format = surface_caps.formats.iter()
            .find(|f| f.is_srgb())
            .copied()
            .unwrap_or(surface_caps.formats[0]);
        let config = wgpu::SurfaceConfiguration {
            usage: wgpu::TextureUsages::RENDER_ATTACHMENT,
            format: surface_format,
            width: size.width,
            height: size.height,
            present_mode: surface_caps.present_modes[0],
            alpha_mode: surface_caps.alpha_modes[0],
            view_formats: vec![],
            desired_maximum_frame_latency: 2,
            color_space: wgpu::SurfaceColorSpace::Auto,
        };
Here we are defining a config for our surface. This will define how the surface creates its underlying SurfaceTextures. We will talk about SurfaceTexture when we get to the render function. For now, let's talk about the config's fields.
The usage field describes how SurfaceTextures will be used. RENDER_ATTACHMENT specifies that the textures will be used to write to the screen (we'll talk about more TextureUsagess later).
The format defines how SurfaceTextures will be stored on the GPU. We can get a supported format from the SurfaceCapabilities.
width and height are the width and the height in pixels of a SurfaceTexture. This should usually be the width and the height of the window.
present_mode uses wgpu::PresentMode enum, which determines how to sync the surface with the display. For the sake of simplicity, we select the first available option. If you do not want runtime selection, PresentMode::Fifo will cap the display rate at the display's framerate. This is essentially VSync. This mode is guaranteed to be supported on all platforms. There are other options, and you can see all of them in the docs
alpha_mode is honestly not something I'm familiar with. I believe it has something to do with transparent windows, but feel free to open a pull request. For now, we'll just use the first AlphaMode in the list given by surface_caps.
view_formats is a list of TextureFormats that you can use when creating TextureViews (we'll cover those briefly later in this tutorial as well as more in depth in the texture tutorial). As of writing, this means that if your surface is sRGB color space, you can create a texture view that uses a linear color space.
color_space this tells wgpu how your windowing system expects colors to be laid out. It's more of an advanced topic so I won't be covering it here. In most cases Auto should be good enough.
Now that we've configured our surface properly, we can add these new fields at the end of the method. The is_surface_configured field will be used later.
    async fn new(window: Arc<Window>) -> anyhow::Result<State> {
        // ...

        Ok(Self {
            surface,
            device,
            queue,
            config,
            is_surface_configured: false,
            window,
        })
    }
resize()
If we want to support resizing in our application, we're going to need to reconfigure the surface every time the window's size changes. That's the reason we stored the physical size and the config used to configure the surface. With all of these, the resize method is very simple.
// impl State
pub fn resize(&mut self, width: u32, height: u32) {
    if width > 0 && height > 0 {
        self.config.width = width;
        self.config.height = height;
        self.surface.configure(&self.device, &self.config);
        self.is_surface_configured = true;
    }
}
This is where we configure the surface. We need the surface to be configured before we can do anything with it. We set the is_surface_configured flag to true here and we'll check it in the render() function.
Note that the max supported dimension in WebGL is 2048 px. If you have a larger display, you must cap the height and width, e.g.:
if width > 0 && height > 0 {
  let max = 2048;
  self.config.width = width.min(max);
  self.config.height = height.min(max);
handle_key()
This is where we'll handle keyboard events. Currently just want to exit the app when the escape key is pressed. We'll do some other stuff later.
// impl State
fn handle_key(&self, event_loop: &ActiveEventLoop, code: KeyCode, is_pressed: bool) {
    match (code, is_pressed) {
        (KeyCode::Escape, true) => event_loop.exit(),
        _ => {}
    }
}
We'll need to call our new handle_key() function in the window_event() function in App.
impl ApplicationHandler<State> for App {
    // ...

    fn window_event(
        &mut self,
        event_loop: &ActiveEventLoop,
        _window_id: winit::window::WindowId,
        event: WindowEvent,
    ) {
        let state = match &mut self.state {
            Some(canvas) => canvas,
            None => return,
        };

        match event {
            // ...
            WindowEvent::KeyboardInput {
                event:
                    KeyEvent {
                        physical_key: PhysicalKey::Code(code),
                        state: key_state,
                        ..
                    },
                ..
            } => state.handle_key(event_loop, code, key_state.is_pressed()),
            _ => {}
        }
    }
}
update()
We don't have anything to update yet, so leave the method empty.
fn update(&mut self) {
    // remove `todo!()`
}
We'll add some code here later on to move around objects.
render()
Here's where the magic happens. First, we need to get a frame to render to.
// impl State

fn render(&mut self) -> anyhow::Result<()> {
    self.window.request_redraw();

    // We can't render unless the surface is configured
    if !self.is_surface_configured {
        return Ok(());
    }

    let output = match self.surface.get_current_texture() {
            wgpu::CurrentSurfaceTexture::Success(surface_texture) => surface_texture,
            wgpu::CurrentSurfaceTexture::Suboptimal(surface_texture) => {
                surface_texture
            }
            wgpu::CurrentSurfaceTexture::Timeout
            | wgpu::CurrentSurfaceTexture::Occluded
            | wgpu::CurrentSurfaceTexture::Validation => {
                // Skip this frame
                return Ok(());
            }
            wgpu::CurrentSurfaceTexture::Outdated => {
                self.surface.configure(&self.device, &self.config);
                return Ok(());
            }
            wgpu::CurrentSurfaceTexture::Lost => {
                // You could recreate the devices and all resources
                // created with it here, but we'll just bail
                anyhow::bail!("Lost device");
            }
        };
The get_current_texture function will wait for the surface to provide a new SurfaceTexture that we will render to. We'll store this in output for later.
let view = output.texture.create_view(&wgpu::TextureViewDescriptor::default());
This line creates a TextureView with default settings. We need to do this because we want to control how the render code interacts with the texture.
We also need to create a CommandEncoder to create the actual commands to send to the GPU. Most modern graphics frameworks expect commands to be stored in a command buffer before being sent to the GPU. The encoder builds a command buffer that we can then send to the GPU.
    let mut encoder = self.device.create_command_encoder(&wgpu::CommandEncoderDescriptor {
        label: Some("Render Encoder"),
    });
Now we can get to clearing the screen (a long time coming). We need to use the encoder to create a RenderPass. The RenderPass has all the methods for the actual drawing. The code for creating a RenderPass is a bit nested, so I'll copy it all here before talking about its pieces.
    {
        let _render_pass = encoder.begin_render_pass(&wgpu::RenderPassDescriptor {
            label: Some("Render Pass"),
            color_attachments: &[Some(wgpu::RenderPassColorAttachment {
                view: &view,
                resolve_target: None,
                depth_slice: None,
                ops: wgpu::Operations {
                    load: wgpu::LoadOp::Clear(wgpu::Color {
                        r: 0.1,
                        g: 0.2,
                        b: 0.3,
                        a: 1.0,
                    }),
                    store: wgpu::StoreOp::Store,
                },
            })],
            depth_stencil_attachment: None,
            occlusion_query_set: None,
            timestamp_writes: None,
            multiview_mask: None,
        });
    }

    // submit will accept anything that implements IntoIter
    self.queue.submit(std::iter::once(encoder.finish()));
    self.queue.present(output);

    Ok(())
}
First things first, let's talk about the extra block ({}) around encoder.begin_render_pass(...). begin_render_pass() borrows encoder mutably (aka &mut self). We can't call encoder.finish() until we release that mutable borrow. The block tells Rust to drop any variables within it when the code leaves that scope, thus releasing the mutable borrow on encoder and allowing us to finish() it. If you don't like the {}, you can also use drop(render_pass) to achieve the same effect.
The last lines of the code tell wgpu to finish the command buffer and submit it to the GPU's render queue.
We need to update the event loop again to call this method. We'll also call update() before it, too.
// in ApplicationHandler<State> for App
    fn window_event(
        &mut self,
        event_loop: &ActiveEventLoop,
        _window_id: winit::window::WindowId,
        event: WindowEvent,
    ) {
        let state = match &mut self.state {
            Some(canvas) => canvas,
            None => return,
        };

        match event {
            // ...
            WindowEvent::RedrawRequested => {
                state.update();
                match state.render() {
                    Ok(_) => {}
                    Err(e) => {
                        // Log the error and exit gracefully
                        log::error!("{e}");
                        event_loop.exit();
                    }
                }
            }
            // ...
        }
    }
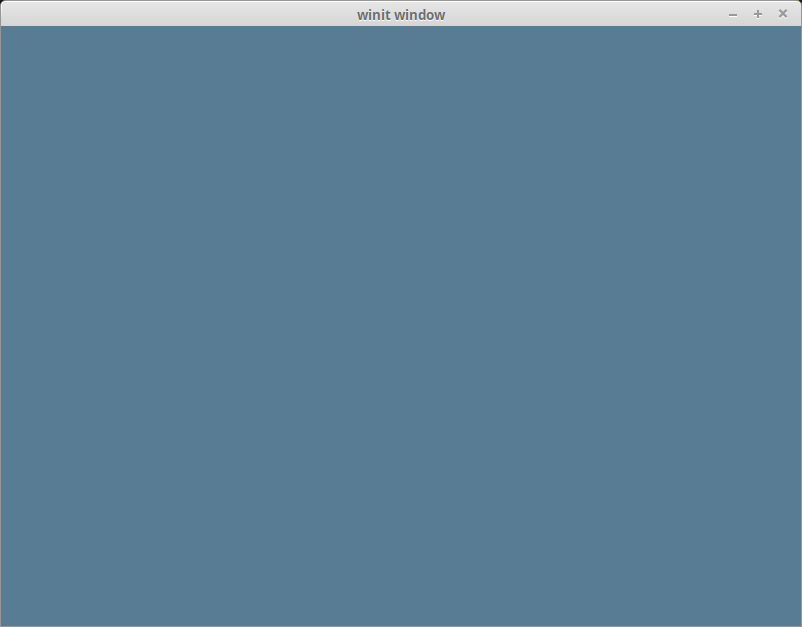
With all that, you should be getting something that looks like this.
Wait, what's going on with RenderPassDescriptor?
Some of you may be able to tell what's going on just by looking at it, but I'd be remiss if I didn't go over it. Let's take a look at the code again.
&wgpu::RenderPassDescriptor {
    label: Some("Render Pass"),
    color_attachments: &[
        // ...
    ],
    depth_stencil_attachment: None,
}
A RenderPassDescriptor only has three fields: label, color_attachments and depth_stencil_attachment. The color_attachments describe where we are going to draw our color to. We use the TextureView we created earlier to make sure that we render to the screen.
We'll use depth_stencil_attachment later, but we'll set it to None for now.
Some(wgpu::RenderPassColorAttachment {
    view: &view,
    resolve_target: None,
    ops: wgpu::Operations {
        load: wgpu::LoadOp::Clear(wgpu::Color {
            r: 0.1,
            g: 0.2,
            b: 0.3,
            a: 1.0,
        }),
        store: wgpu::StoreOp::Store,
    },
})
The RenderPassColorAttachment has the view field, which informs wgpu what texture to save the colors to. In this case, we specify the view that we created using surface.get_current_texture(). This means that any colors we draw to this attachment will get drawn to the screen.
The resolve_target is the texture that will receive the resolved output. This will be the same as view unless multisampling is enabled. We don't need to specify this, so we leave it as None.
The ops field takes a wgpu::Operations object. This tells wgpu what to do with the colors on the screen (specified by view). The load field tells wgpu how to handle colors stored from the previous frame. Currently, we are clearing the screen with a bluish color. The store field tells wgpu whether we want to store the rendered results to the Texture behind our TextureView (in this case, it's the SurfaceTexture). We use StoreOp::Store as we do want to store our render results.
Validation Errors?
If wgpu is using Vulkan on your machine, you may run into validation errors if you are running an older version of the Vulkan SDK. You should be using at least version 1.2.182 as older versions can give out some false positives. If errors persist, you may have encountered a bug in wgpu. You can post an issue at https://github.com/gfx-rs/wgpu
Demo
Challenge
Create a handle_mouse_moved() method to capture mouse events, and update the clear color using that. Hint: you'll probably need to use WindowEvent::CursorMoved.